


Blow Dry Without Damage 8 Settings and Techniques That Protect Your Hair
Blow Dry Without Damage: 8 Settings and Techniques That Protect Your Hair

Almost every woman with shoulder-length or longer hair has stood in front of the mirror, dryer in hand, wondering why her ends look fried even after a $200 trim. The salon blowout lasts five days. The at-home blowout looks rough by lunch. The culprit is rarely the hair — it is almost always blow dry technique. In this guide, we will walk through the eight settings on your dryer that actually matter, the sectioning method that quietly removes 50% of the damage, and the right way to apply heat protectant spray so it does what the label promises. By the final paragraph you will be able to blow dry without damage even on the most fragile color-treated lengths.
Before we dive in, one honest note: there is no such thing as "heat-free damage." Hot air moving across the cuticle at the wrong angle, the wrong distance, or without a protectant will always chip away at the keratin layer. What we can control is how much damage happens per minute. The settings and techniques below are what our Guangzhou stylist team uses on photo-shoot models, and what we teach every export client who buys our professional dryers for their salon chains.
Why Most Blow-Drying Damage Is Self-Inflicted

Hair damage from a dryer comes from four root causes. Three of them are under your direct control.
- Temperature that is too high. The cuticle starts to lift and crack above 150°C (302°F). Most at-home dryers run hotter than that on the "high" setting because that is what gets the job done in five minutes flat.
- Drying wet hair to 100% bone-dry. Hair retains 5-10% internal moisture even when it "feels" dry. Pushing the dryer until zero humidity remains is the single fastest way to fry the ends.
- Holding the nozzle in one spot. Concentrated heat on a 2-inch patch for 15 seconds can lift the cuticle all the way to the cortex.
- Skipping protectant. Without a film of heat protectant spray between the hair shaft and the air stream, there is nothing absorbing or distributing the energy.
The fix is not to throw out your dryer. It is to change how you use it. We cover each variable in the next four sections. If you only have time to change one habit this week, start with sectioning — it is the largest single source of damage reduction, and it costs nothing. For a deeper look at how heat interacts with chemically treated hair, see our related guide on Is Argan Oil Good for Hair? Discover the Benefits for Hair and Skin, which explains why oils work as a secondary shield after a thermal protectant base.
The 8 Settings That Matter (Temp, Speed, Cool Shot, etc.)

Modern dryers ship with 6-12 buttons and dials. Most of them are marketing. Eight settings actually move the needle on whether your hair ends up smooth or singed. The table below lists them in priority order, the typical recommended value for fine-to-medium hair, and the value we use on thick or coarse hair.
| Setting | What It Does | Fine Hair | Thick / Coarse Hair |
|---|---|---|---|
| 1. Temperature (low) | Air at 60-80°C (140-176°F) | Yes, default for roots | For finish only |
| 2. Temperature (medium) | Air at 80-110°C (176-230°F) | Mid-lengths and ends | Roots and mid-lengths |
| 3. Temperature (high) | Air at 110-150°C (230-302°F) | Avoid | Briefly, on damp sections |
| 4. Airflow (low) | Soft, slow air for styling | Yes, for finishing | No, too slow |
| 5. Airflow (high) | Fast air to remove water fast | Yes, to dry faster at lower temp | Yes, throughout |
| 6. Cool shot button | 20°C room-temperature burst | Yes, set the style | Yes, set the style |
| 7. Ionic / ceramic mode | See ionic vs ceramic hair dryer below | Ceramic, gentler | Ionic, faster drying |
| 8. Concentrator nozzle | Focuses airflow to a 1-inch slot | Always attach | Always attach |
If your dryer only has three buttons (off / low / high), you are not alone — about 60% of the dryers sold globally are still in that format. In that case, work mostly on low, finish with cool, and rely on blow dry technique to compensate. You will not get the same speed, but you can still blow dry without damage.
For buyers sourcing dryers for a salon chain or hotel amenity program, our OEM line supports custom button layouts, voltage (110V / 220V), and cord length. See the engineering options in our Karseell Private Label Hair Care Shampoo and Conditioner – Promotes Healthy Scalp and Hair-OEM And ODM Services Available overview; the same OEM workflow applies to dryer hardware for brand buyers who want a one-stop amenity program.
The ionic vs ceramic hair dryer choice
The "ionic vs ceramic hair dryer" debate comes up in every buyer conversation we have. Here is the practical answer. Ceramic heating elements emit a more even infrared heat — they do not have hot spots that scorch one strand while leaving another damp. Ionic generators break water molecules into smaller droplets so the hair dries faster at a lower temperature. For fine or color-treated hair, ceramic wins on gentleness. For thick, coarse, or very curly hair, ionic wins on time. A dryer that uses both — ionic generator + ceramic coil — is the right pick if you have one dryer serving a whole household. If you want the long-form version of the spec sheet, our partner-buyer guide covers wattage, voltage, and material sourcing — see Why Now is the Perfect Time to Partner with Karseell for Hair Care Products.
Sectioning: The Hidden 50% of Damage Reduction

If you only adopt one technique from this article, make it sectioning. Most at-home users grab a fistful of hair from the top, blast it with hot air, and call it done. The underneath layers stay damp, so they go over them again — and again — until they are crunchy. By that point the top layer has been dried three times. That is where the visible damage lives.
Professional stylists work in four quadrants: two in the back (split down the middle) and two in the front (split ear to ear). Each quadrant is clipped up while the others are being dried. Within each quadrant, sub-sections are no thicker than the diameter of the round brush — usually 1 to 1.5 inches. Here is the sequence we teach:
- Step 1: Detangle on dry hair before you even step into the shower. Wet hair tangles more, and tangles + heat = breakage.
- Step 2: After towel-blotting (never rub with a towel), separate four quadrants and clip three up. Work the bottom quadrant first.
- Step 3: Within the bottom quadrant, take a 1-inch sub-section. Place the round brush under the section, nozzle above and pointing down the hair shaft. Pull the brush and dryer together, slowly, from root to tip.
- Step 4: Hit the cool shot for 3 seconds at the end of each sub-section to set the cuticle flat.
- Step 5: Move up. Each layer is dried once and only once. The total time is usually 8-12 minutes — about the same as the "quick blast" method, with dramatically less damage.
For extensions, the same sectioning logic applies, but you must avoid tension on the bonds. Our guide on How to Maintain and Protect Your Keratin Bonded Hair Extensions walks through the exact brush-and-dryer angles that keep keratin bonds intact for the full 8-12 week wear cycle.
Distance and Angle: What Stylists Do That You Don't

The two variables that look trivial but matter most are distance (how far the nozzle is from the hair) and angle (which direction the air is pointing). Get these right and you can compensate for an older dryer with no temperature control.
Distance rule: keep the nozzle 6 to 8 inches (15-20 cm) from the hair shaft. Closer than that, the cuticle overheats before you can see steam. Further than that, you are just blowing cool air around. Use the back of your free hand as a heat gauge — if it feels uncomfortable after 3 seconds, you are too close.
Angle rule: always point the airflow down the hair shaft, from root to tip. The cuticle scales lie flat when air flows in that direction. When air flows from tip to root — which is what happens when you flip your head upside down and blow upward — the scales lift and you create frizz. Upside-down blowouts look good in the first five minutes because of volume, but they pay for it in frizz by hour two.
If your hair is layered or has face-framing pieces, angle the airflow slightly along the lay of the cut, never perpendicular to it. And if you are using a concentrator nozzle (you should be), the slot should always be vertical, not horizontal, so the air tracks in a narrow sheet rather than fanning out. This is also the answer to the FAQ question of how close the dryer should be: 6-8 inches at the closest, 10-12 inches when finishing the cool shot.
The Right Way to Use Heat Protectant
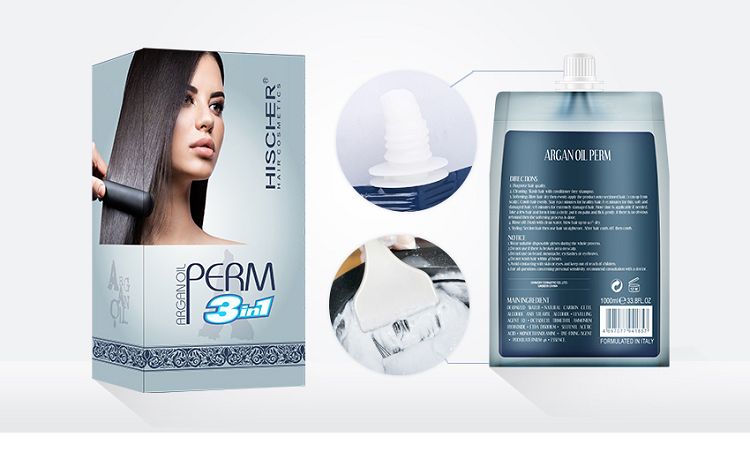
Heat protectant spray is the single most under-used product in home hair care. Surveys of salon walk-outs show that 70% of clients buy a protectant at the salon, take it home, and use it incorrectly or not at all. The most common mistakes:
- Spraying on soaking wet hair. The product drips off before the dryer ever arrives. Spray on damp hair (towel-blotted, not dripping).
- Spraying once on top. One pass on the crown protects about 30% of the hair shaft. You need 6-8 sprays minimum, distributed from mid-length to ends.
- Skipping the reapplication step. If you section and your first quadrant takes 4 minutes, the protectant on the last quadrant is already thinned out. Mist each quadrant again right before you dry it.
- Using a silicone-heavy serum as a "protectant." Serums smooth the cuticle after drying. They are not thermal shields. Use a true thermal protectant first, then a finishing serum after.
The application order that works in our stylist team's test salons: (1) towel-blot to damp, (2) comb through to detangle, (3) apply thermal protectant from mid-length to ends, (4) section into quadrants, (5) re-apply a light mist to each quadrant just before drying, (6) finish with cool shot, (7) apply a small drop of argan or marula oil to ends only. The full step-by-step is in our keratin-extension maintenance guide referenced above, and the broader product-protection logic is also covered in Which treatment is best for hair?.
One last tip on choosing the right protectant. If your hair is fine, pick a water-based aerosol mist. If your hair is medium, pick a fine-mist pump spray with dimethicone. If your hair is thick or coily, pick a cream protectant that doubles as a light hold. For curl pattern protection, the protein-and-moisture balance we recommend in Will goat milk make your hair grow back? applies here too: the goal is to seal in moisture before the heat arrives, not to layer product after the fact.
FAQ: Blow Dry Without Damage
Is ionic or ceramic hair dryer better?
For fine or color-treated hair, ceramic wins on gentleness because it produces more even infrared heat with fewer hot spots. For thick or coarse hair, ionic wins on time because it breaks water into smaller droplets and dries the hair faster at a lower temperature. If you have one dryer for the whole household, pick a model that combines both — ceramic coil with an ionic generator — so you get speed and evenness in the same tool. The full spec breakdown is in the table above.
What temperature should I use to blow-dry fine hair?
Fine hair should stay below 80°C (176°F) on the roots and below 60°C (140°F) on the ends. Use the medium setting on the dryer (not the high setting) and combine it with high airflow so the water leaves the hair before the heat has time to over-process the cuticle. If your dryer only has low and high, use low and accept a longer dry time — that is the trade-off for keeping fine hair intact.
How close should the dryer be to my hair?
Keep the nozzle 6 to 8 inches (15-20 cm) from the hair shaft during the hot phase, and pull back to 10-12 inches (25-30 cm) during the cool shot. Use the back of your free hand as a heat gauge — if it feels uncomfortable after 3 seconds, you are too close. Closer than 4 inches, you risk localized cuticle lift that no amount of protectant can offset.
Does a cool shot really set the style?
Yes. The cool shot drops the cuticle temperature fast enough that the keratin scales lock into whatever position the brush has just placed them. That is what gives a salon blowout its 4-5 day hold. Without a cool shot, the cuticle cools slowly under ambient air and relaxes back to its natural position, which is why at-home blowouts typically fall flat by lunch. Hold the cool shot for 3-5 seconds on each section after the heat phase is complete.
Can I blow-dry without heat protectant?
Technically yes, on a low setting at 8+ inches distance for a short dry on already-damp hair. Practically, no. Without a thermal protectant, every pass of the dryer directly contacts the cuticle with full heat energy. The result is faster cuticle lift, more breakage, and faster color fade on dyed hair. Think of heat protectant spray as the seatbelt: you can drive without it, but the damage compounds every single time.
Article last updated: 2026-10-13 | Author: Karseell Editorial Team | Reviewed by: Guangzhou Chinchy Cosmetic Group Stylist Team
